Posts in "Recipes"
Recipe: Low Carb Chicken Enchilada Bake (Keto, Paleo)

Well guys, it's a new year, and I'm doing some experimenting with my diet and giving keto a try. I really love Paleo a lot, and I would say what I'm doing right now is just a Paleo-friendly version of keto (but at the same time I'm eating quite a bit more dairy than I usually do, so we'll see how that goes). Over the past few months I've been all over the place with my eating habits, so I'm looking forward to reigning it in and really cutting out grains and sugar again.

I came up with this Paleo recipe before the holiday break, and yesterday I made it again for lunch with some cheddar cheese. If you don't do dairy or simply want to keep this Paleo, you can just skip the cheese. Or, you can do half and half--I put cheese on Rob's and left mine dairy-free. Do whatever works for you! I think this would be awesome with a squeeze of lime juice and some sliced avocado, but it's really delicious on its own.

Low Carb Chicken Enchilada Bake

Ingredients: 

  • 1-2 tablespoons olive oil, plus more for drizzling
  • Half of a yellow onion, sliced thinly
  • 1-2 cloves of garlic, minced
  • 1-1 1/2 pounds of chicken breasts (you could also use thighs)
  • About a tablespoon of taco seasoning (or a mixture of cumin, chili powder, cayenne pepper)
  • About 1/2 pound of Brussels sprouts, chopped
  • 1/4 cup sliced mushrooms
  • 1/2 cup Enchilada sauce (use one with little to no added sugar)
  • 1-2 handfuls of shredded cheddar cheese (optional)
  • Salt and pepper, to taste
  • About 2 tablespoons of chopped lettuce and 1/8 of a diced red onion, for garnish

Instructions: 

  1. Pre-heat oven to 350.
  2. In an oven-safe skillet, sauté onion in olive oil over medium heat for about 5 minutes. Stir frequently and add the garlic. Reduce heat to medium-low and cook for an additional 10 minutes, or until onions are caramelized.
  3. Move onions to the side of the pan and add chicken (season first with taco seasoning, salt, and pepper) to the pan. Move the onions so that they're surrounding the chicken. Cook chicken for about 5 minutes on one side and then flip. Add the chopped Brussels sprouts and mushrooms, then drizzle more olive oil over the vegetables and chicken. Season with salt and pepper, stirring to combine everything. Pour enchilada sauce over the whole thing.
  4. Transfer pan to the oven and bake for 10-15 minutes, or until the veggies are crispy and the chicken is cooked through. (Add cheese a few minutes before serving if desired.) Garnish with chopped lettuce, raw Brussels sprouts, and diced red onion.
Related Posts Plugin for WordPress, Blogger...
Recipe: Grain-Free Holiday Donuts

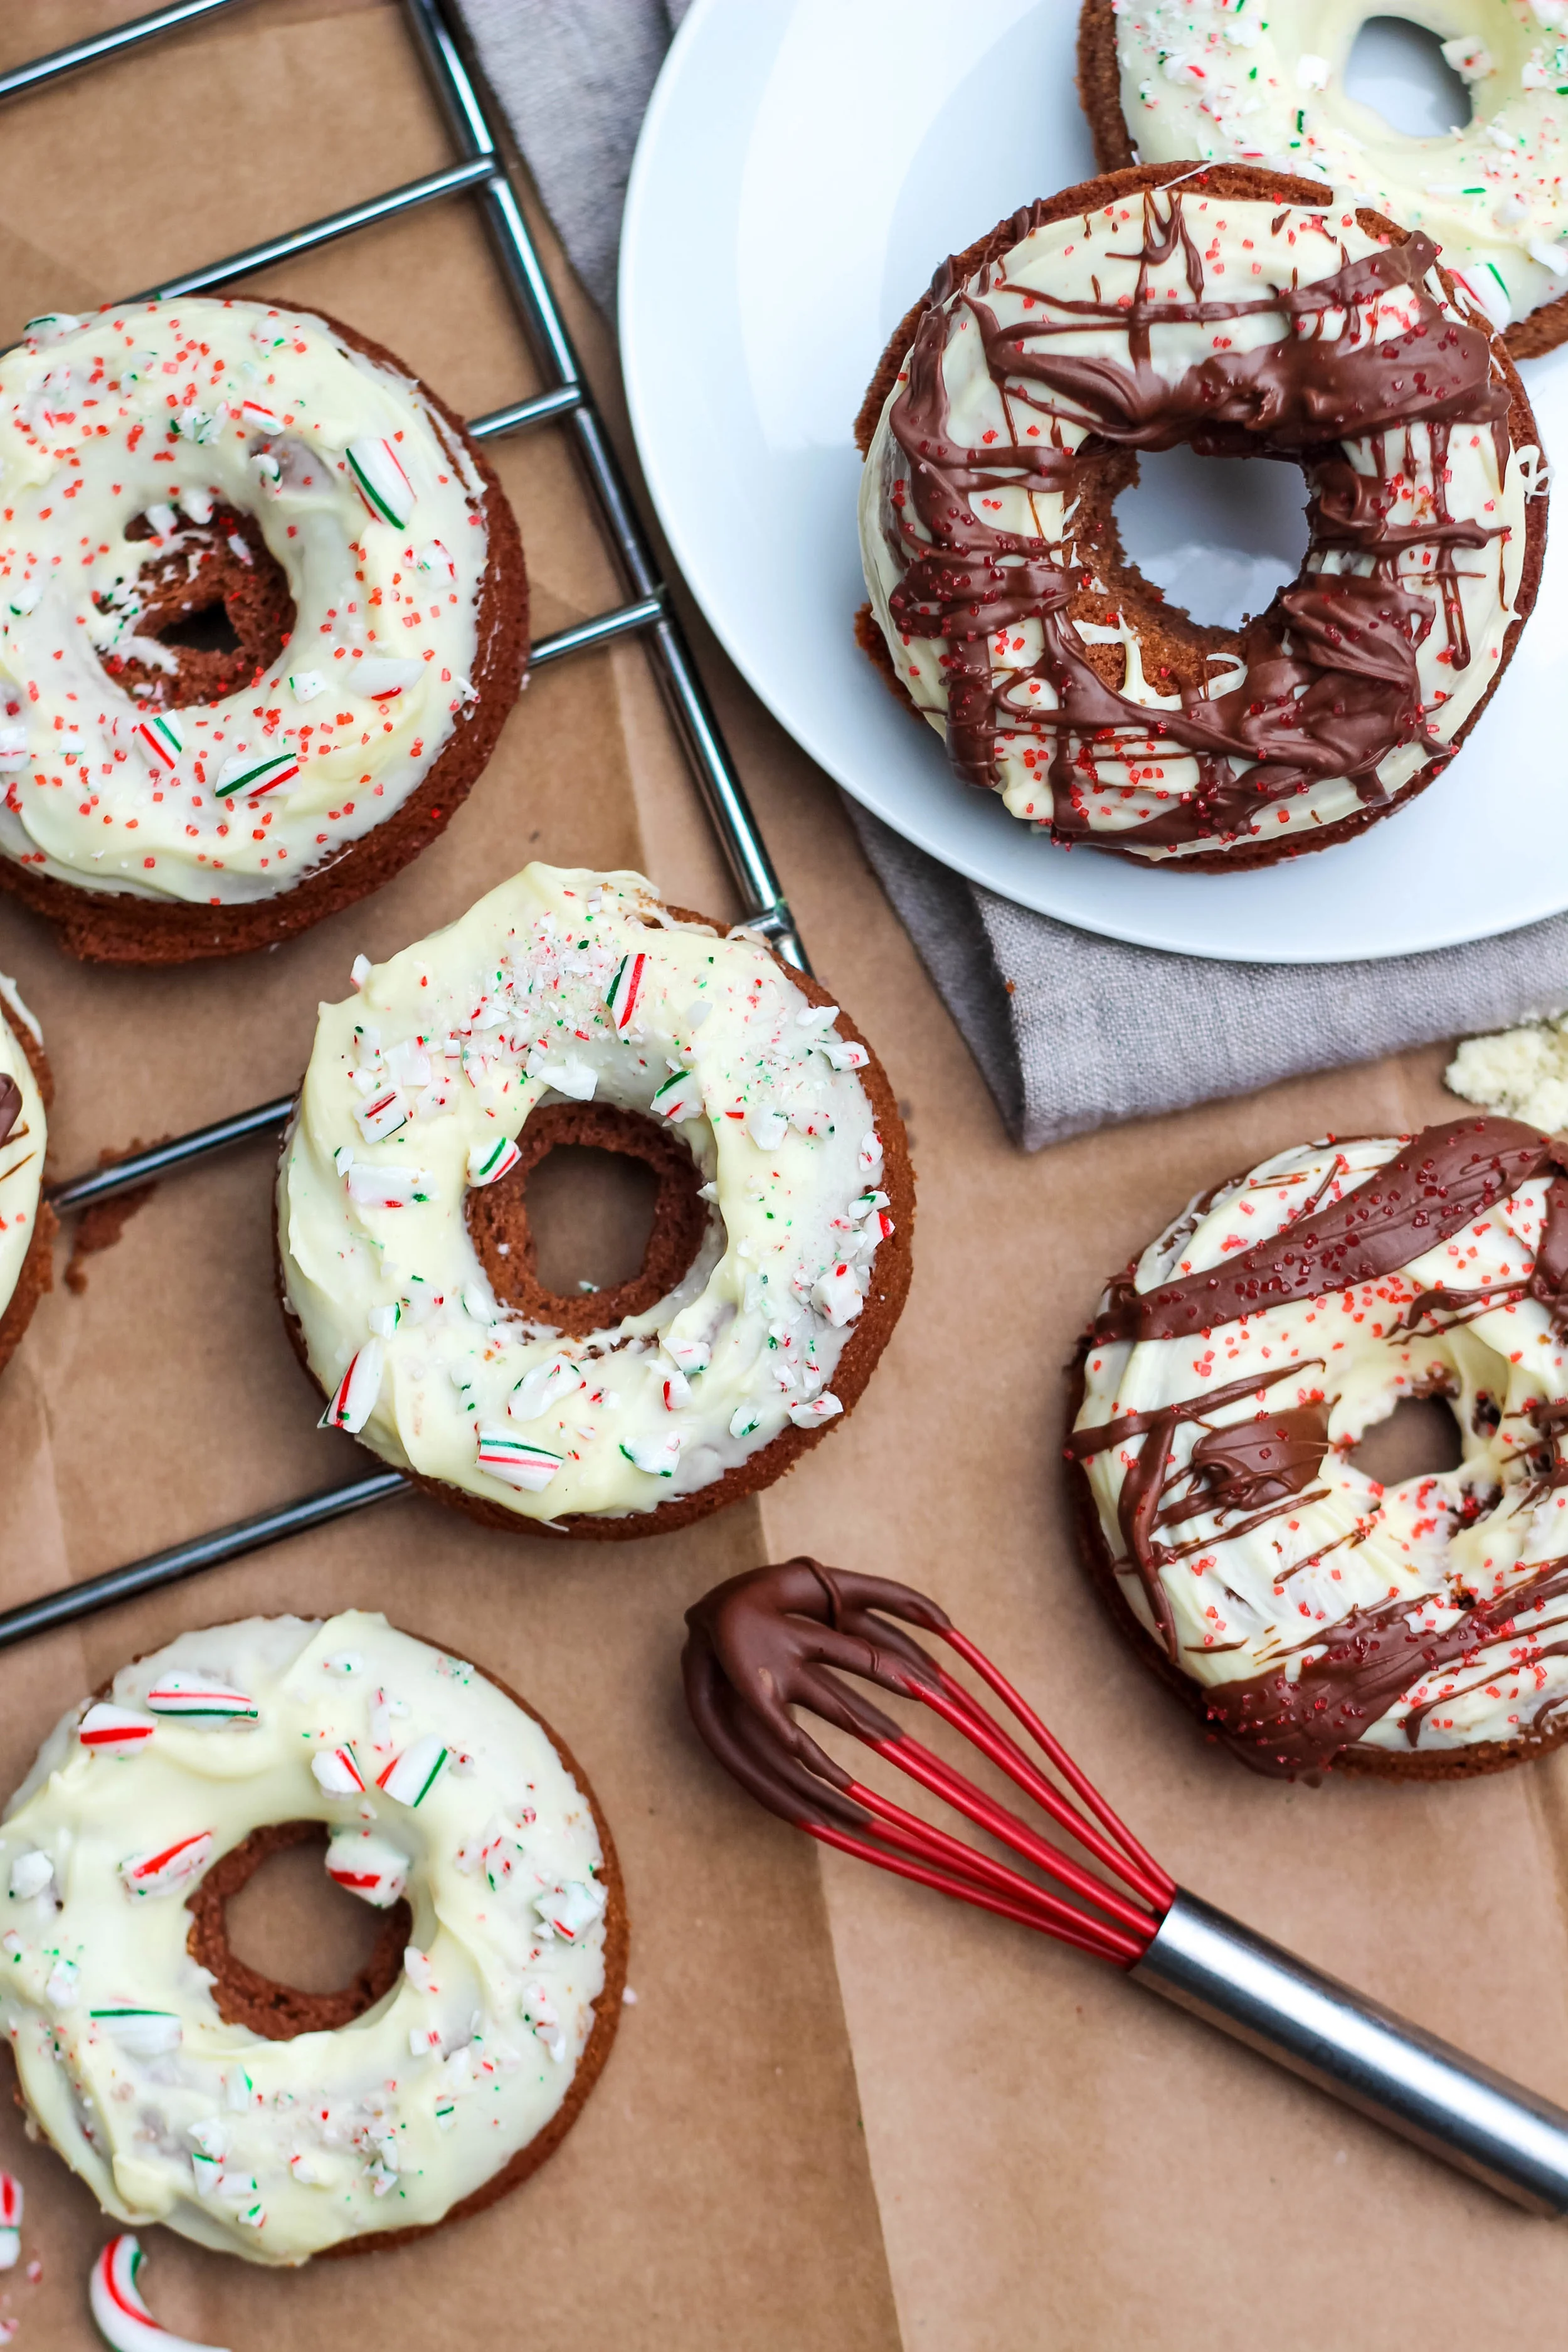
I always get super excited about holiday baking. In the fall, before Thanksgiving, I want pumpkin everything, and then as December approaches I almost always go in the direction of salted caramel. This year, though, I've really been feeling the combination of peppermint and chocolate.

Last month, Bob's Red Mill sent me some of their flours and asked me to bake something holiday-inspired, so I dusted off the ol' donut pan and got to work. I love their almond flour and use it all the time in my kitchen--I love that it's naturally gluten-free and low in carbs, which is especially great when you plan to dip your finished product in chocolate and then dust everything with crushed candy canes. Balance, right?

It's kind of great, though--I always associate almond flour with strictly Paleo recipes, but it works just as well when you're using conventional baking ingredients like sugar and white chocolate. So, I suppose now is a good time for this disclaimer: the following donuts are definitely grain-free, but they are in no way Paleo-friendly. Because sugar. Hey, it's the most wonderful time of the year.

Grain-Free Chocolate Peppermint Baked Donuts (adapted from this Bob's Red Mill Almond Cake recipe)

Ingredients: 

For the donuts:

  • 1 1/2 cups Bob's Red Mill Almond Flour (grab a coupon here)
  • 1/2 cup coconut flour (I used Bob's Red Mill for this, too)
  • 2 teaspoons baking powder
  • A pinch of salt
  • 1/4 cup cocoa powder (unsweetened)
  • 3/4 cup softened butter
  • 1 cup sugar
  • 4 eggs
  • 1/2 cup milk (I kept it dairy-free with the coconut creamer I sometimes put in my coffee)
  • 1 teaspoon peppermint extract

For the white chocolate glaze and toppings:

  • 12 ounces white chocolate chips
  • 1 teaspoon peppermint extract
  • 6-8 ounces of semi-sweet chocolate chips
  • 1-2 candy canes, crushed
  • Red and/or green sprinkles (optional)

Instructions: 

  1. Preheat the oven to 350 degrees.
  2. In a large bowl, cream the butter and sugar together until light and fluffy. Add the eggs, one at a time, mixing each until it's combined.
  3. In a separate bowl, mix the almond flour, coconut flour, baking powder, and salt together. 
  4. Slowly add the dry ingredients to the wet ones. Mix until incorporated. Add the cocoa powder and peppermint extract.
  5. Pipe batter into a donut pan and bake for about 20 minutes, or until you can poke one of the donuts with a knife and it comes out clean. (If you don't have a piping bag you can easily use a plastic freezer bag. To keep the batter from getting all over my hands, I like to put the bag in a big glass, then fold the edges over the side of glass before spooning the batter into the bag. Remove the bag, twist the top to secure the batter, and use a pair of scissors to cut the corner off the bag and voila! A homemade piping bag.)
  6. When the donuts are done baking, remove from oven and allow to cool. Sometimes they pop right out of the donut pan, other times they need to cool completely, then you can transfer them to a cooling rack.
  7. To make the white chocolate glaze, melt the white chocolate chips on low in a small saucepan. Add peppermint extract and continually stir until liquid. While that's going, you can melt semi-sweet chocolate chips in a bowl in the microwave. Remove the white chocolate from heat and working quickly, dip one side of each donut in the melted white chocolate. Drizzle semi-sweet chocolate, if desired, and top with crushed candy canes and/or sprinkles.

Happy holidays, and happy baking!

I was selected for this opportunity as a member of CLEVER and the content and opinions expressed here are all my own.

Related Posts Plugin for WordPress, Blogger...
Recipe: Lemon Herb Tilapia with Green Bean Potato Salad

In the past, I haven't really made a lot of fish at home. We've lived in a few apartments and for some reason I always feel like it stinks up the whole place, so I'd save it for nights when we planned to grill outside (or I'd just order a seafood dish at a restaurant and not have to clean up at all!). While I was writing my cookbook, the fish chapter seemed like it was going to be the hardest for me--but after a bit of experimenting I learned that preparing fish at home is actually super easy and quick.

I'm excited to welcome Bumble Bee to the blog once again--I always love it when they ask me to cook for them. This time I tried out their new Bumble Bee SuperFresh® product--they sent me the Tilapia with Lemon, Pepper, and Herbs and it was so easy to prepare that I whipped up a green bean and potato side dish to compliment it.

Green Bean Potato Salad with Garlic-Lemon Butter

Ingredients: 

  • 1 pound of fingerling potatoes, washed and sliced in half
  • 10-12 ounces of green beans, cut into halves or thirds (depending on the size)
  • 3-4 tablespoons of butter
  • Zest and juice of half a lemon
  • 2 cloves of garlic, minced or sliced thinly
  • Salt and pepper, to taste

Instructions:

  1. Cook the potatoes in boiling water for about 10 minutes, or until they're fork-tender. Steam or boil the green beans just until they turn bright green but still have some snap to them, about 4-5 minutes. Drain both and add to a large bowl.
  2. In a small bowl or saucepan, melt butter and mix with garlic and lemon zest. Give it a stir and add the lemon juice. Stir to combine and then drizzle over the green bean and potato mixture. Toss to combine and season with salt and pepper.

A couple of messages from Bumble Bee:

Bumble Bee SuperFresh® smells and tastes amazing. No fishy smells here. Because you prepare Bumble Bee SuperFresh® straight from the freezer, there isn’t any smell associated with thawing fish. And our frozen protein has stayed that way from harvest to your oven unlike most of the “fresh” fish you find at the seafood counter. That means it is fresh tasting, and fresh smelling.
All our seafood is no mess, and no fuss; just pure perfection, time after time. Our premium Salmon and Tilapia come with their own parchment paper baking pouch and go from freezer to table in under 25 minutes. High in protein, richly seasoned with pure and simple ingredients that let our fish shine through!

This is a super easy dinner you can make with minimal dishes, which I always love. The fish only takes 18 minutes, so you can preheat the oven while you prep the veggies and then cook everything at the same time. Talk about 30 minutes or less! I've been eating the leftover green bean and potato salad all week, reheated slightly with a generous grating of fresh parmesan. Delicious.

Check out the Bumble Bee SuperFresh® store locator here or order with Amazon Fresh here.

I was selected for this opportunity as a member of CLEVER and the content and opinions expressed here are all my own.

Related Posts Plugin for WordPress, Blogger...